
In the beautiful spring and summer months, I can't wait to get outside and go for a hike on the wooded trail by my house. I love making terrariums, and the best place to find treasures for my seasonal mini-gardens is almost in my backyard. If you love making terrariums as much as I do, the following four easy steps to foraging in your own habitat will set you on the right path!

Step 1: Choose a Container
Depending on where you live, you'll need to choose either an open or closed container to match the kinds of plants that grow naturally in your area. Here in the Midwest, I am working with plants that enjoy the humidity of a closed or semi-closed system. If you live in an arid area, like the Southwest, plants foraged from your trails will prefer an open system, which will allow the plants to be in a naturally dry environment. In selecting a container, be sure to match the inside environment with the outside. This way, you know the bounty from nature will continue to thrive after being removed from its natural environment.
Step 2: Gather your foraging tools
You'll want to take a few things with you when you go foraging to make the harvesting a bit easier:
- a basket or bucket to hold your found objects
- a pair of pruners to clip thick stems or woody plants
- a paint scraper for gently removing fine materials
- a garden spade for removing the root base of plants
- a few small individual containers for loose materials, such as quart jars with lids.
You may be surprised how handy these tools will be for collecting your treasures, which sometimes may be hiding in plain sight.
Step 3: Harvest your live material
On your hike be sure to be looking for plants that are in their infancy. Fern fronds, and pine saplings are great examples for a foraged terrarium. Using your garden spade, remove these items and keep them safely in your basket.

Other living materials that are bountifully available in my neck of the woods are living mosses and lichens. Usually found in damp, shaded areas, and sometimes growing on trees or even along the ground, these lovely living pieces of nature will add depth, decoration and more life to your foraged creation. Gently using your paint scraper, remove the moss or lichen and add to your basket.

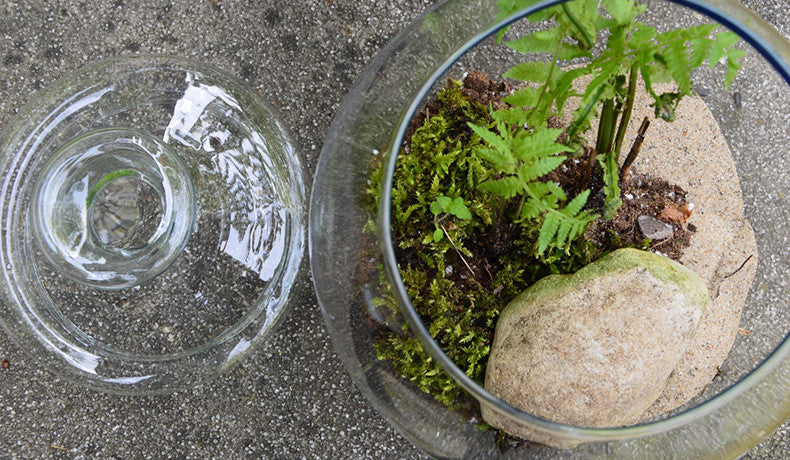
In addition to the living materials, be sure to gather loose stones, soil, and sand that will act as drainage and decorative layers for your terrarium. Perhaps you'll come across an interesting rock or piece of driftwood. These too make great decorative additions to the foraged terrarium.
Step 4: Assemble your terrarium
Assemble your terrarium in four easy steps:
- First, the drainage layer, which can be the loose stones or sand collected from your hike.
- Second is the soil layer, which is the medium in which the living plants will grow
- Third is the plants, which can be planted just as you would in the garden.
- Fourth, add the decoration by placing items like moss, lichen, stones, and driftwood as you found them in nature.

Caring for your terrarium is easy! When you notice that the plants may be getting a little dry, start by adding a small amount of moisture to the terrarium. If you have a closed system with a lid, perhaps just give it a light misting. An open system requires a little more regular attention as it will dry out faster. In either case, visual cues from your plants will tell you when they need a drink.

Building a foraged terrarium is a great way to get acquainted with your natural world. It is also a wonderful activity to do with friends, kids, and loved ones. What could be better than a beautiful day, a healthy walk through the woods, and a project to commemorate the experience? What can you build from your neck of the woods?
Derek
Owner, Floral Underground